How to install the AtomX extension?
Installation method
- ZXP Installer (quickly)
- Manual Installation
When you have installed the extension, you can make the first launch.
ZXP Installer
The easiest and fastest method to install the extension (suitable for both Windows and Mac OS).
Go to the ZXP Installer website, select your operating system and download (.exe for Windows / .dmg for Mac OS).
After installing this application start to install the extension:
Simply drag and drop the AtomX extension (.ZXP filetype) into the ZXP Installer window to start the installation.
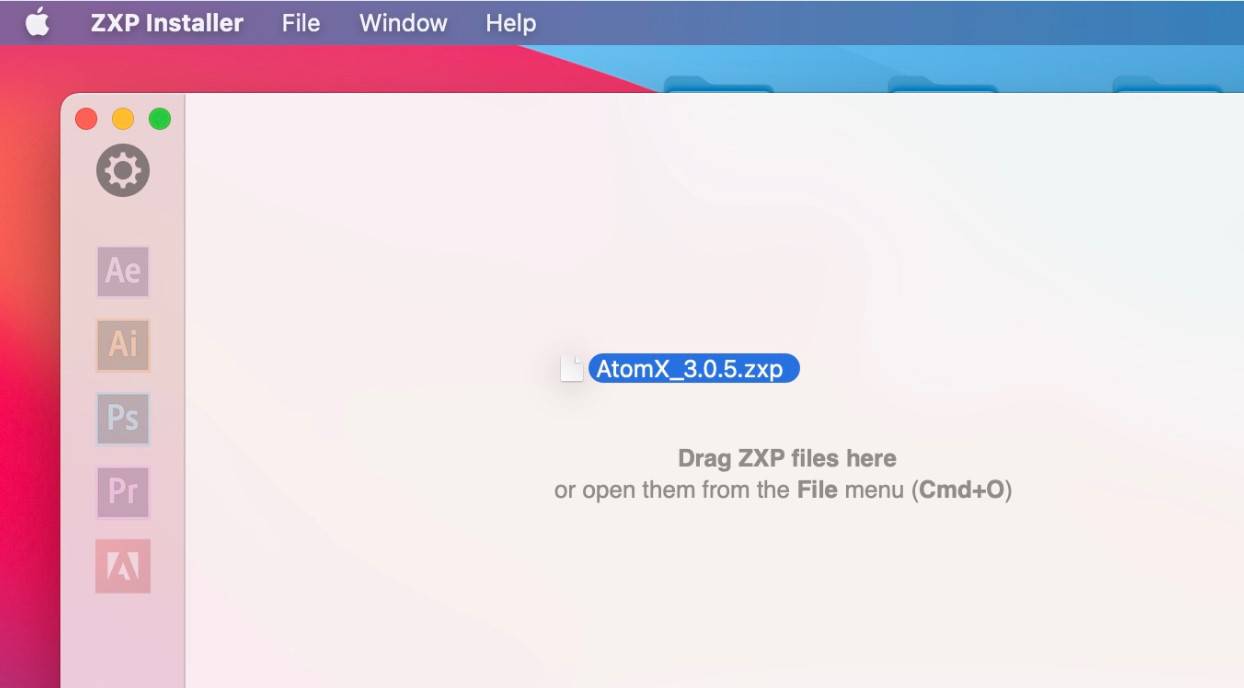
Or go to tab File > Open... and find the extension file to start the installation.
Now the extension is installed and you can run it - see here.
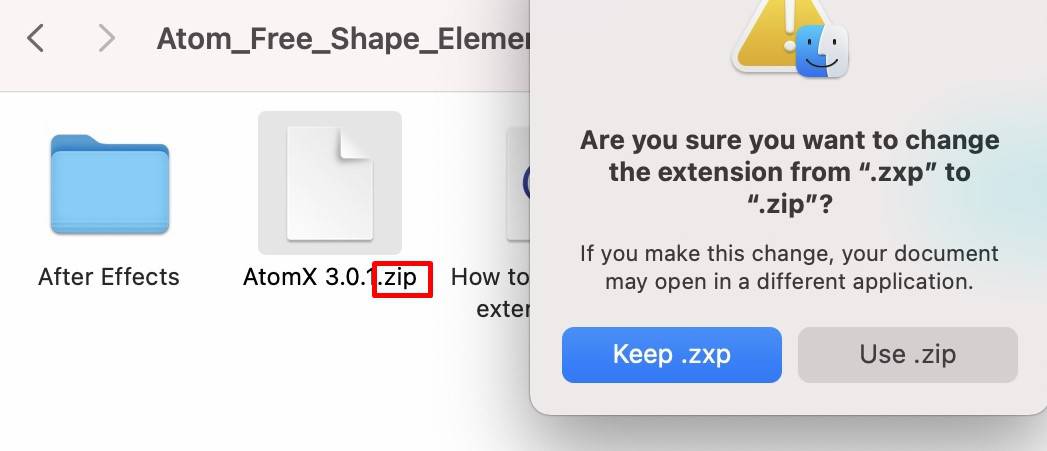
Manual Installation
Rename file type from ZXP to ZIP and confirm the file extension change.
The method is suitable for Windows & Mac OS.
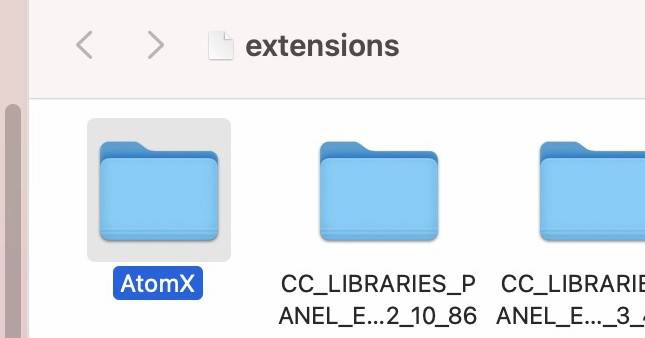
Unzip all files to folder with same name as extension (or any other name - it doesn't matter)
Copy/Move this folder into directory with extensions:
- Windows: Program Files (x86)\Common Files\Adobe\CEP\extensions
- MacOS: Library/Application Support/Adobe/CEP/extensions
Now the extension is installed and you can run it - see here.
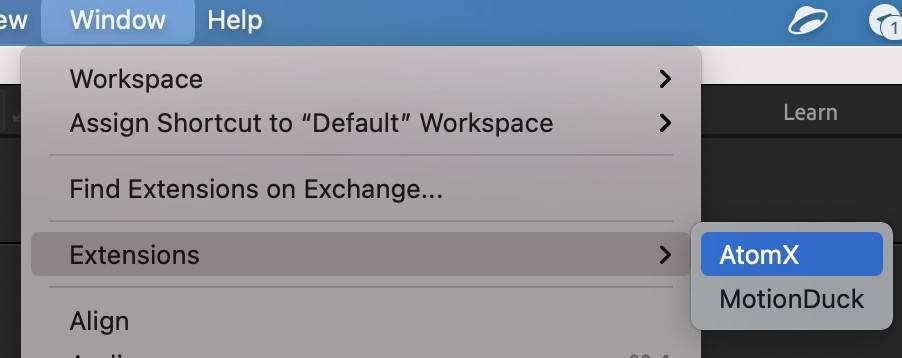
First Launch
When AtomX is installed, restart or run the software (After Effects or Premiere Pro) and go to tab Window > Extensions > AtomX to launch the extension.
You can close the extension after use, or attach it to the panel (the extension will be automatically launched every time you start the Adobe program).